


Setting up your hp printer setup wifi offers the convenience of wireless printing from multiple devices. This step-by-step guide will walk you through the process of HP printer setup on WiFi, ensuring a smooth connection and hassle-free printing experience.
Step 1: Unbox and Prepare Your HP Printer
Start by unboxing your HP printer and ensuring all the components are present. Connect the power cable and turn on the printer. Follow the initial setup instructions on the printer’s control panel to set your language, region, and other preferences.
Step 2: Install Ink Cartridges and Load Paper
Insert the provided ink cartridges into their respective slots and follow the printer’s manual for instructions on loading paper. This ensures your printer is ready for the setup process.
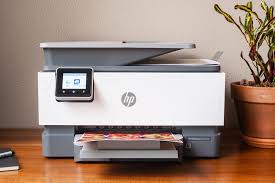
Step 3: Access the Control Panel
Navigate to the control panel on your HP printer. The location of the control panel may vary depending on your printer model, but it’s typically a touchscreen display or a set of physical buttons.
Step 4: Connect to WiFi Network
In the control panel, find the “Setup” or “Settings” option. Select “Network” or “Wireless” and choose the option that allows you to connect to a WiFi network. Follow the on-screen instructions to locate and select your WiFi network.
Step 5: Enter WiFi Password
Once you’ve selected your WiFi network, you’ll be prompted to enter the WiFi password. Use the on-screen keyboard to input the correct password, paying attention to uppercase and lowercase letters.
Step 6: Confirm Connection
After entering the WiFi password, confirm the connection. The printer will attempt to connect to the WiFi network. Once successfully connected, you may see a confirmation message on the control panel.
Step 7: Install HP Printer Software on Your Computer
Visit the official HP website (https://support.hp.com/) and enter your printer model to locate the appropriate software. Download and run the HP printer software on your computer, following the on-screen instructions for installation.
Step 8: Choose Connection Type
During the software installation, you’ll be prompted to choose the connection type. Select “Wireless” or “WiFi” and follow the prompts. The software will identify your connected printer and complete the setup process.
Step 9: Test Print
Once the software installation is complete, perform a test print to ensure the connection is successful. Print a document or photo from your computer to verify that your HP printer is functioning correctly over WiFi.
Step 10: Enable Mobile Printing (Optional)
If you want to enable mobile printing, download the HP Smart app on your smartphone or tablet. Follow the app’s instructions to add your printer and enjoy the convenience of printing from your mobile devices.
Conclusion:
Congratulations! You’ve successfully completed the HP printer setup on WiFi, unlocking the flexibility of wireless printing. By following these step-by-step instructions, you’ve ensured a seamless connection between your hp printer wifi connect. If you encounter any issues during the setup process, consult your printer’s manual or visit the HP support website for model-specific assistance. Happy printing!