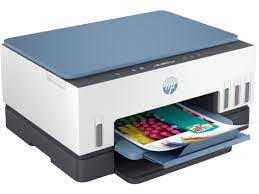
HP printer reset can be a valuable tool when faced with issues like persistent errors, connectivity problems, or performance glitches. In this comprehensive guide, we’ll take you through a step-by-step process to perform an HP printer reset, ensuring a smooth troubleshooting experience.
Step 1: Power Off Your HP Printer Initiate the reset process by turning off your HP printer and disconnecting it from the power source. Allow the printer to power down completely before moving on to the next steps.
Step 2: Identify the Reset Button Locate the reset button on your HP printer. The reset button’s location may vary depending on the model, so it’s essential to refer to your printer’s user manual or check HP’s official documentation for precise instructions.
Step 3: Press and Hold the Reset Button With the printer powered off, press and hold the reset button. Maintain this hold for approximately 5-10 seconds or until you observe indicators, such as lights or display messages, confirming that the reset process has initiated.
Step 4: Power On the Printer While still holding the reset button, power on the HP printer. Continue to hold the reset button until you observe further indicators confirming that the reset process is complete. Release the button once the reset is confirmed.
Step 5: Allow Printer to Initialize Give your printer a few moments to complete the reset process and initialize. It’s crucial to ensure that the printer is fully powered on and ready for use before attempting any further tasks.
Step 6: Perform Test Prints After the reset is complete, perform test prints to ensure that your HP printer is functioning correctly. Print a sample document or run a nozzle check to verify that the ink cartridges are working as expected.
Step 7: Reconnect to WiFi (if applicable) For wireless HP printers, you may need to reconnect to your WiFi network after the reset. Access the printer settings through the control panel or display and follow the prompts to establish a wireless connection.
Step 8: Update Printer Drivers and Firmware After the reset, it’s advisable to visit the official HP website to check for the latest printer drivers and firmware updates. Download and install any available updates to ensure optimal performance and compatibility.
Conclusion: Performing an HP printer reset is an effective method to troubleshoot and resolve various issues, restoring your printer to optimal functionality. By following these step-by-step instructions, you can navigate the reset process with confidence. Remember to refer to your printer’s user manual or HP’s official documentation for model-specific details, ensuring a seamless and hassle-free reset experience.
Title: “Resolving Connectivity Woes: A Step-by-Step Guide When Your Canon Printer Won’t Connect to WiFi”
Introduction: Canon printers are known for their reliability, but occasionally, users may face connectivity issues. If you find yourself in a situation where your Canon printer won’t connect to WiFi, don’t worry. In this comprehensive guide, we’ll take you through a step-by-step troubleshooting process to get your Canon printer back online.
Step 1: Verify WiFi Network Start by ensuring that your WiFi network is operational. Check if other devices can connect to the network without any problems. If there are issues with your WiFi, resolve them first to create a stable environment for your Canon printer.
Step 2: Restart Your Canon Printer Simple yet effective, restarting your Canon printer can resolve minor connectivity issues. Power off the printer, wait for a minute, and then power it back on. Allow the printer to initialize before attempting to reconnect to WiFi.
Step 3: Check WiFi Status on Printer Navigate to the settings menu on your Canon printer and locate the WiFi or network settings. Ensure that the WiFi feature is enabled and that the printer is attempting to connect to the correct network. Confirm that the SSID and password are accurate.
Step 4: Reconnect to WiFi Manually disconnect your Canon printer from the WiFi network through the settings menu. Then, attempt to reconnect by selecting your WiFi network and entering the password. This step ensures a fresh and accurate connection.
Step 5: Update Printer Firmware Outdated firmware can contribute to connectivity issues. Visit the official Canon website, search for your printer model, and download the latest firmware updates. Follow the provided instructions to install the updates and restart your printer.
Step 6: Disable Firewall and Antivirus Firewalls or antivirus software may sometimes block the connection between your Canon printer and the WiFi network. Temporarily disable these security features and attempt to connect your printer to WiFi. Remember to re-enable them after the connection is established.
Step 7: Reset Network Settings If the issue persists, consider resetting the network settings on your Canon printer. Refer to the printer’s user manual for instructions on how to perform a network reset. This action may be necessary to clear any previous configurations causing the problem.
Step 8: Contact Canon Support If all else fails, it’s time to seek assistance from Canon’s customer support. Visit the official Canon support website or contact their helpline for personalized guidance and solutions tailored to your specific printer model.
how to reset hp printer to factory settings :-Conclusion: Facing a situation where your Canon printer won’t connect to WiFi can be challenging, but by following these step-by-step solutions, you can systematically troubleshoot and resolve the issue. Patience and thoroughness are key, and in most cases, you’ll have your Canon printer successfully connected to WiFi, ready for seamless printing once again.