


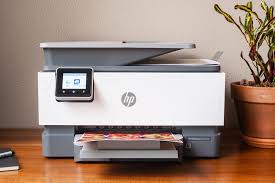
hp printers troubleshooting steps, but occasional issues may arise that can interrupt your printing experience. In this comprehensive guide, we’ll walk you through step-by-step troubleshooting to ensure that your HP printer works seamlessly.
Step 1: Check Physical Connections
The first step is to ensure that all physical connections are secure. Confirm that your HP printer is properly connected to the power source and your computer or network. A loose cable might be the cause of the problem.
Step 2: Verify Printer Status
Access your computer’s “Devices and Printers” section and check the status of your HP printer. Ensure it is set as the default printer and that there are no error messages. If necessary, clear any pending print jobs.
Step 3: Restart Your HP Printer
A simple restart can resolve many common issues. Power off your HP printer, wait for a minute, and then turn it back on. This action helps refresh the printer’s internal settings and may resolve minor glitches.
Step 4: Update Printer Drivers
Outdated or incompatible drivers can lead to printing problems. Visit the official HP website, enter your printer model, and download the latest drivers. Install them on your computer and restart it to ensure the changes take effect.
Step 5: Run HP Print and Scan Doctor
HP provides a dedicated diagnostic tool called “HP Print and Scan Doctor.” Download and run this tool to automatically identify and fix common printing issues. It’s a quick and effective way to troubleshoot problems.
Step 6: Clear Paper Jams
Paper jams are a common printer issue. Open your HP printer and carefully remove any jammed paper. Be sure to follow the manufacturer’s guidelines for clearing paper jams to avoid damaging the printer.
Step 7: Check Ink or Toner Levels
Low ink or toner levels can affect print quality or cause printing errors. Check the ink or toner levels on your HP printer and replace any cartridges that are running low. This step ensures optimal print performance.
Step 8: Adjust Print Settings
Sometimes, printing issues can be resolved by adjusting print settings. Access the printer properties on your computer and ensure that the settings, such as paper size and print quality, match your printing requirements.
Step 9: Perform a Test Print
To verify that your HP printer is working correctly, perform a test print. This helps you identify any remaining issues and ensures that the printer produces the desired output.
Conclusion:
Troubleshooting your HP printer doesn’t have to be a daunting task. By following these step-by-step guidelines, you can address common issues and maintain the optimal functionality of your hp printer troubleshooting guide, and in most cases, you’ll be able to resolve any printing concerns efficiently. If problems persist, don’t hesitate to reach out to HP’s customer support for further assistance.